Create a signing to set up your documents and forms with signature, initial, and date areas, determine who the documents and forms are sent to, and send them to any needed participants, such as buyers, sellers, outside agents and lawyers.
Steps
- Do one of the following:
- To add a standalone signing, navigate to Authentisign
 .
. - To add a signing to a transaction, navigate to the transaction, and click Signings.
- Click Add
 .
.
The Create Signing window opens.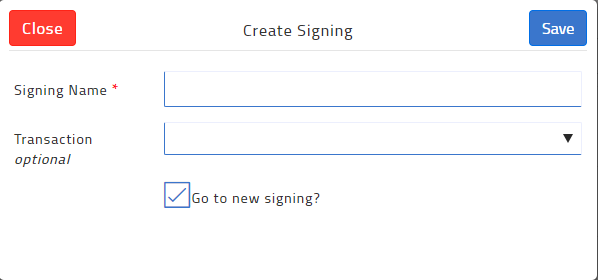
- Type a name for the signing in the Signing Name field. For example: Type the name of the signer, the name of the document to be signed, the stage of the deal process, or the name of the transaction property.
- Where Applicable: If you are creating a standalone signing, use the Transaction dropdown to select an available transaction from the list if you need to attach the signing to a transaction.
- Optional: Check Go to new signing to start the Authentisign wizard immediately after you save the signing.
- Click Save.
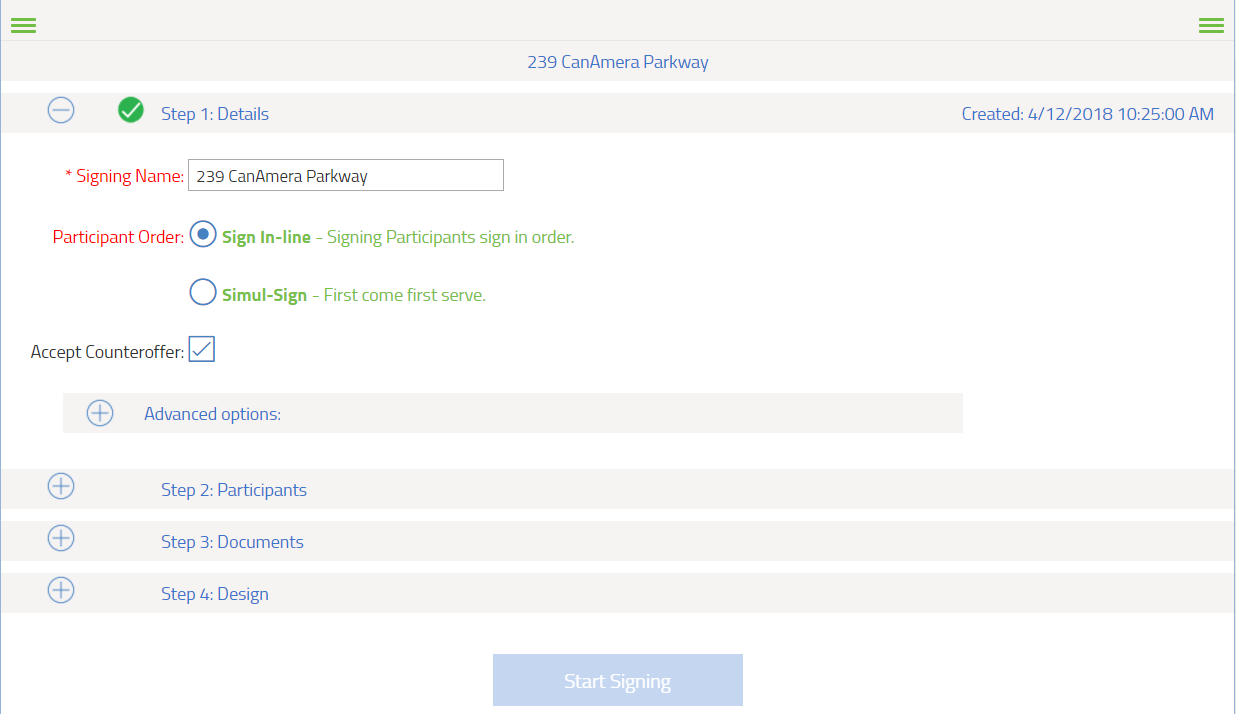
If you checked Go to new signing in Step 5, then the Authentisign wizard opens on Step 1: Details.
If you did not check Go to new signing in Step 5, the list of signings opens.
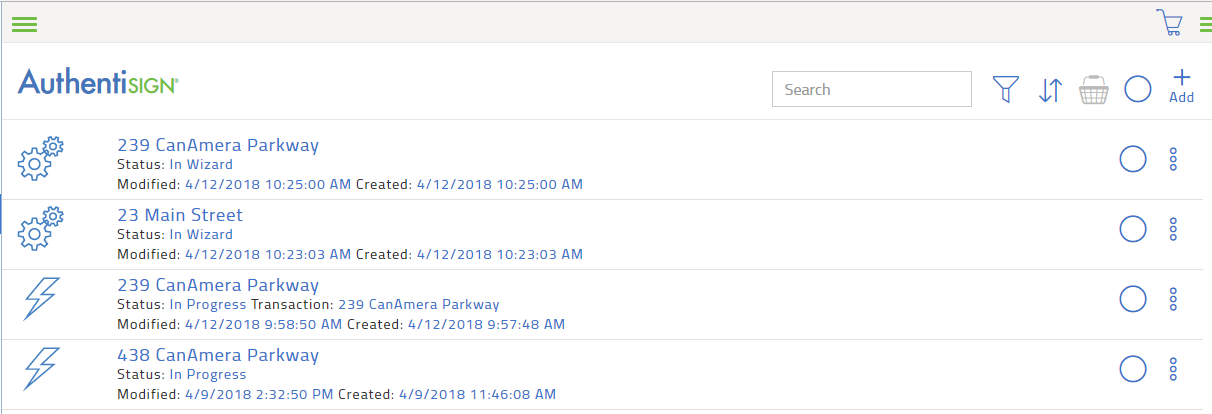
Click the name on a signing with the In Wizard status  to begin the Authentisign wizard for that signing.
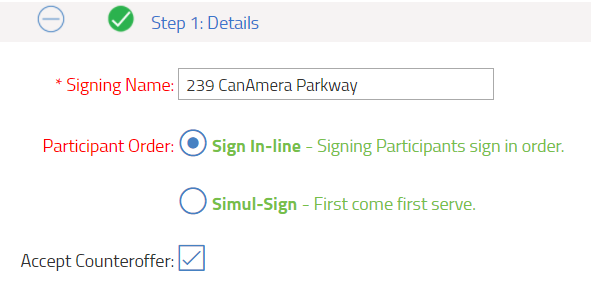
- In the Authentisign wizard for the selected signing, in Step 1: Details, for the Participant Order, select the option to specify what order to send the email to the participants. Select Sign In-line to invite the participants one at a time to sign, in a specified order. Select Simul-Sign to send the email to all participants at the same time. Regardless of the option you choose, all signatures and initials are captured in one final document.
- If you want to set an expiry date on the invitation, or to send reminders, click Advanced options.
Step 1: Details expands to display additional options.
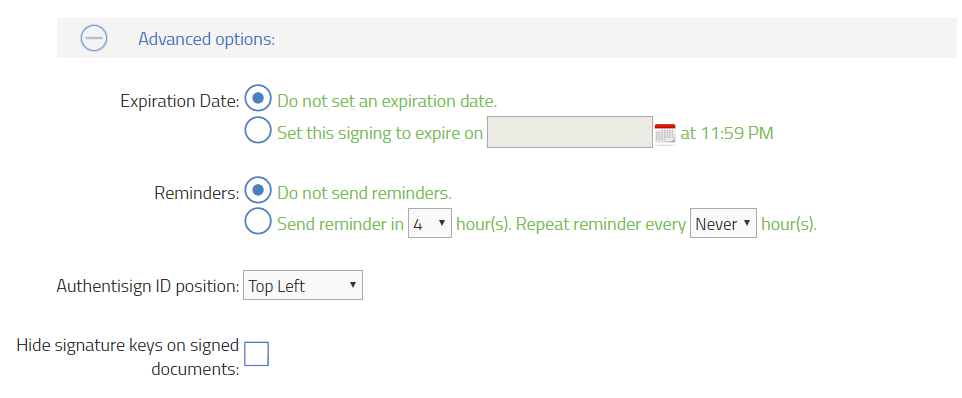
- To set an expiration date, check Set this signing to expire on and select the date. After the specified date and time, if the signing is not complete, the participants can no longer access the signing.
- To send a reminder, check Send reminder in, and select the number of hours to send the reminder after the initial email invite. Also, use the Repeat reminder every dropdown to select how many hours to wait before sending another reminder email after the first reminder.
- Click Step 2: Participants to add the people who need to sign the documents or forms.
The Add Participants window opens.
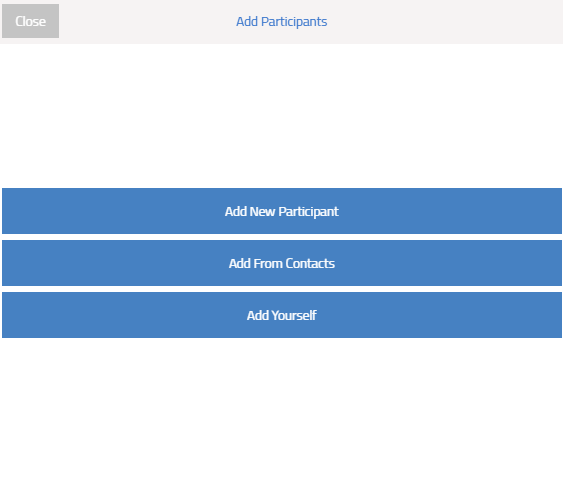
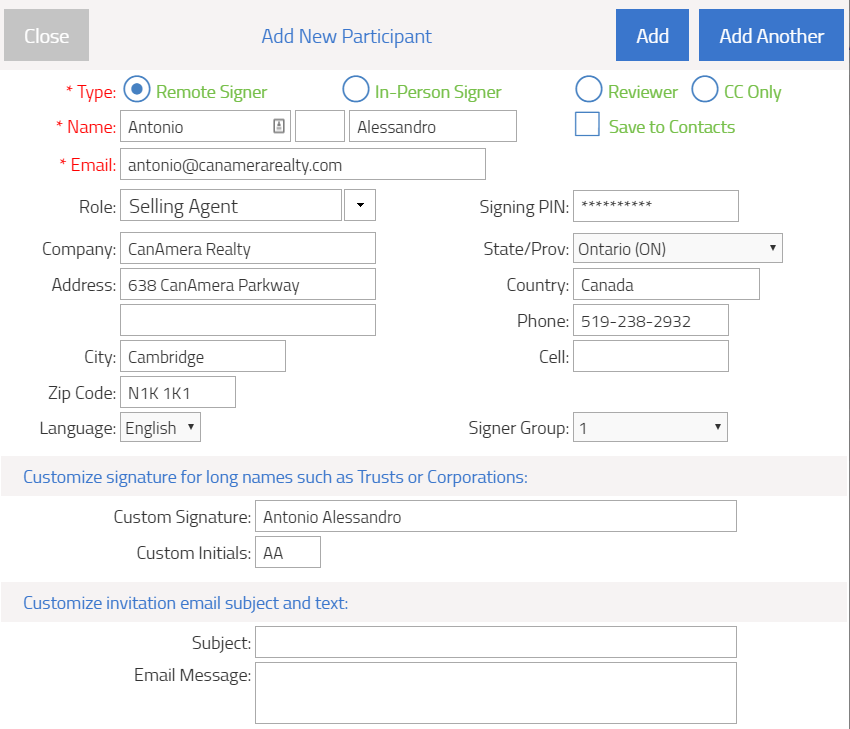
- Optional: To add a participant manually, click Add New Participant.
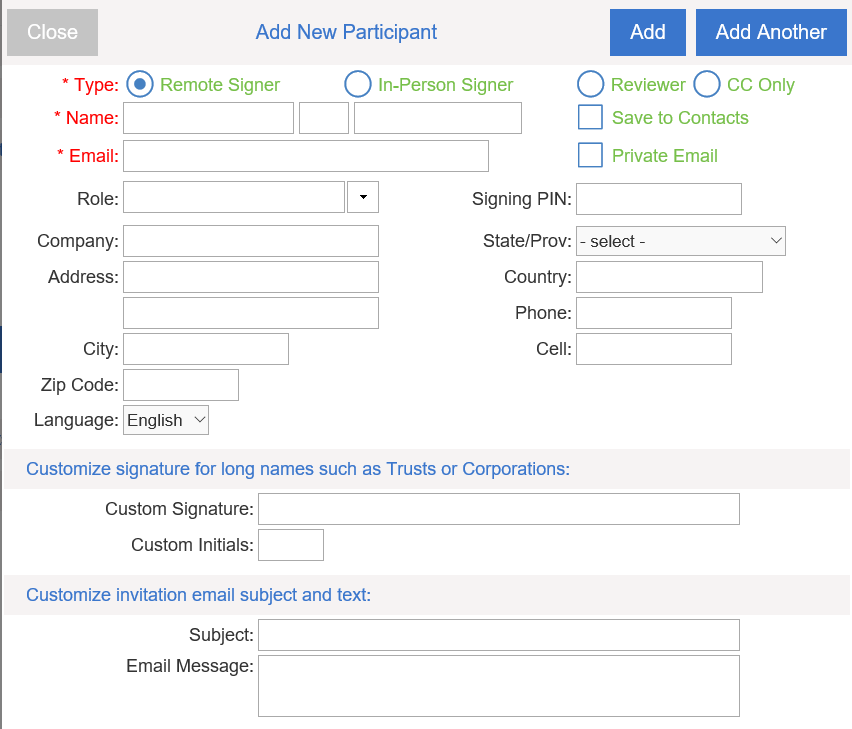
- For Type, select the type of participant.
- For Name, enter the name of the participant.
- For Email, enter the email address of the participant. All other fields are optional.
- If you select a contact as an In-Person Signer, you must specify a Signing Host PIN, and you become the host on her behalf. The PIN verifies that you were present when the signing took place.
- Optional: If you choose to add a Signing PIN, you create the PIN and deliver it in a secondary notification to the participants.
- Optional: Check Save to Contacts to add the participant to your TransactionDesk contacts. Checking this option does not add the contact to the transaction itself.
- Select what type of participant each person is. Choose from the following:
- Remote Signer: A person who needs to sign, and is able to receive the invitation via email, and has access to it via an internet device.
- In-Person Signer: A person who needs to sign, but does not have access to email. The email invitation is sent to you personally. You are responsible for having this person sign, on your device.
- Reviewer: A person who is not signing, but needs to review the document and signatures. This person can accept or reject the signed document or form.
- CC Only: A person who is to receive a copy of the final email message, and access to any signed documents.
- Click Add.
The participant is added to the list of participants.
- Optional: To add a participant from your list of contacts or address book, click Add From Contacts.
The Add Contacts window opens.
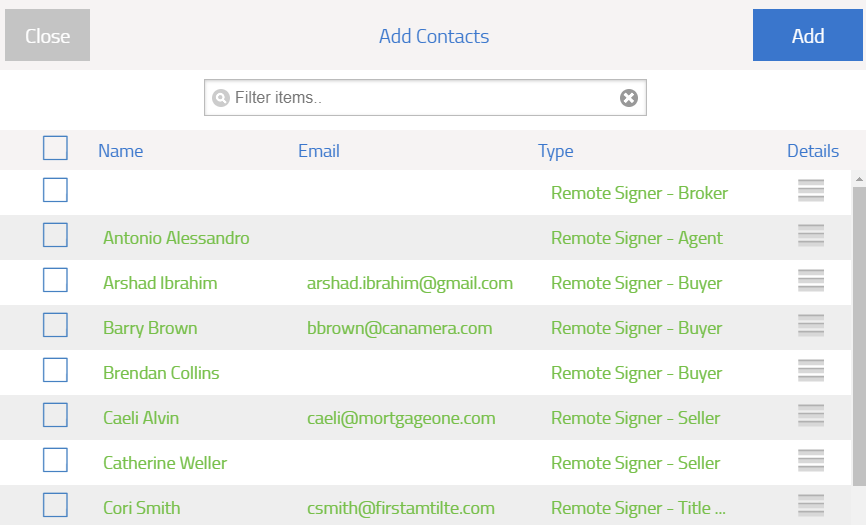
- Check the contact(s) to add to the list.
- Select the participant type. See Step 10 for more information how to complete this section.

- When you have finished selecting contacts to add, click Add.
The contacts are added to the list of participants.
- Optional: To add yourself to the signing, click Add Yourself.
The Add New Participant window opens.
- Review and update your information as necessary. See Step 10 for more information on how to complete this section, and click Add.
You are added to the list of participants.
- When you are finished adding participants, click Step 3: Documents. Step 3: Documents expands to display additional options.
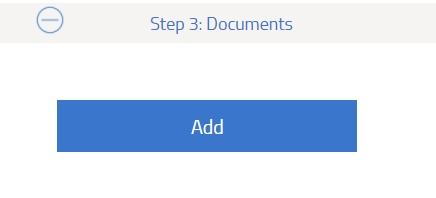
- Click Add to add any more documents or forms to the list. The Add Documents window opens.
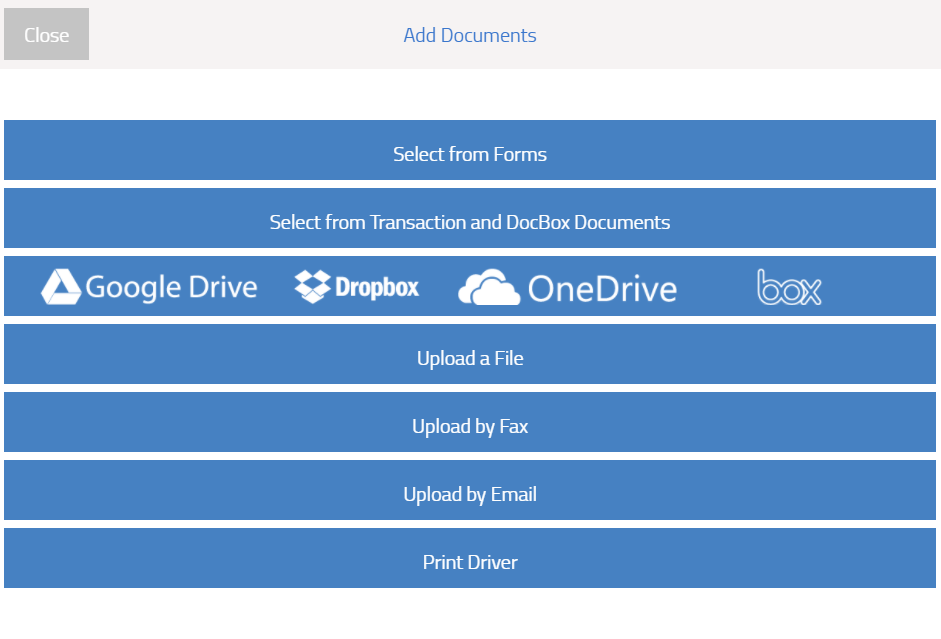
- Do one of the following:
- Click Select from Forms to choose a form from the available InstanetForms folders.
- Click Select from Transaction and DocBox Documents to choose a form from the available DocBox folders.
- Click Google Drive to access your Google Drive documents.
- Click Dropbox to access your Dropbox documents.
- Click OneDrive to access your OneDrive documents.
- Click box to access your box documents.
- Click Upload a File to upload a document from your computer or mobile device’s file manager.
- Click Upload by Fax, to upload a document from a fax machine.
- Follow the instructions on how to set up your fax cover sheet
- Click Fax.
- Type the fax number in the available field
- Click Send.
- Click Upload by Email to upload a document via email, and then follow the directions in the Upload by Email window.
- Click Print Driver to set up the Authentisign Printer driver, if you have not already done so.The Authentisign printer allows you to virtually “print” a document to TransactionDesk by selecting the Authentisign printer from the list of printers in any of your computer or mobile device’s applications.
The selected documents and forms are added to the list of documents in the signing.
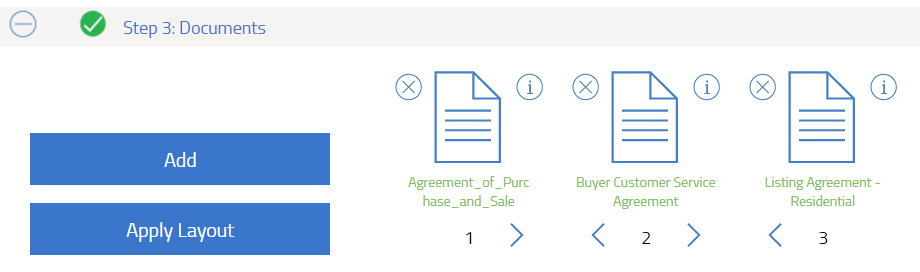
- Optional: Change the order of the documents and forms to be signed by clicking the left or right arrows in the list.

- If you need to apply a document layout to a document in the list, click Apply Layout, and then do the following:
- In the Select Document window, click on the document you need to apply a layout to.
- In the Select Layout window, use the Layout dropdown to select the layout you need to apply.
- Use the Signing Participant dropdown next to each signer type, to ensure that the correct signers are mapped to the correct signer types.
See “Create an Authentisign Layout” for more information on document layouts.
- When you are finished adding documents, click Step 4: Design.
The document editor page opens on the first page of the document or form in the documents list. All documents and forms appear in this view, one after another, based on the order they appear in the documents list.
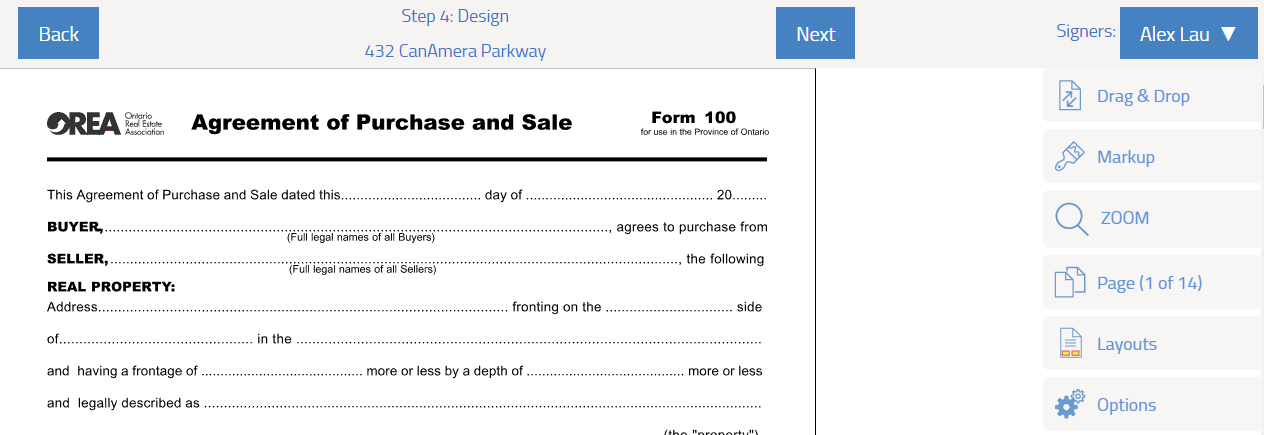
- Use the Signers dropdown to select which signer to set up the document for.It is important to always be aware of who you are setting up the signing for, as certain signing spaces only apply to certain participants.

- Use the available tools to arrange the spaces for participants to review, sign, initial, and date, as well as mark up the document to indicate, hide, or alter portions of the document as needed. See “Signing Editor Tools” below.
- Right click on a drag and drop item, or markup to access the right click menu for that item.
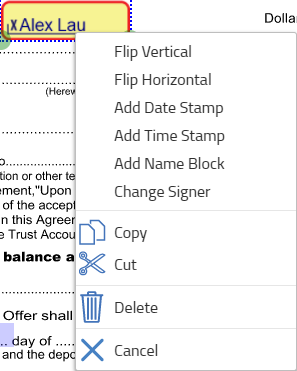
The right click menu options allow you to make fine changes to each item, such as adding date or time stamps, or altering font color and size.
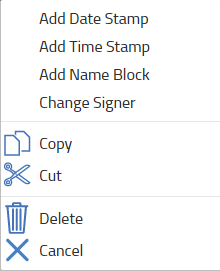
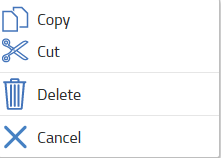
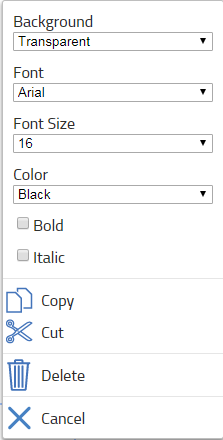
Note: The available right click menu options vary by drag and drop item or markup.
- Repeat Steps 20 -22 for each participant that is to sign.
- When you are finished making changes to the document or form for all users, click Next.
The Finalize Signing Setup window opens.
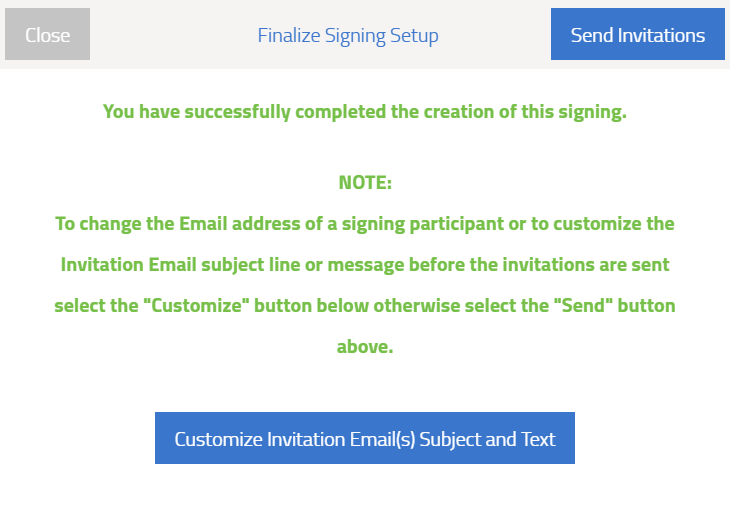
- Optional: To customize the invitations, or email text and subject, click Customize Invitation Email(s) Subject and Text.
- When you are ready, click Send Invitations, and click OK. The invitations are sent to all participants.
See “Complete and Return a Signing” for more information on how to complete the sent signing.
Signing Editor Tools
| Menu Option | Tool Name | How To Use |
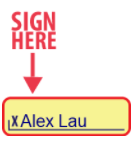
| Drag & Drop |  Sign Here Sign Here | Drag and drop on to the document or form to create a required space for a participant to add their digital signature.
 |
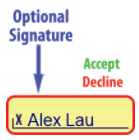
 Sign Optional Sign Optional | Drag and drop on to the document or form to create an optional space for a participant to add their digital signature.
 |
 Initial Here Initial Here | Drag and drop on to the document or form to create a required space for a participant to add their digital initials.
 |
 Initial Optional Initial Optional | Drag and drop on to the document or form to create an optional space for a participant to add their digital initials.
 |
 Initial Group Initial Group | Drag and drop on to the document or form to create multiple checkboxes to indicate initialling.
 |
 Checkbox Checkbox | Drag and drop on the document or form to create a required checkbox.
 |
 Optional Checkbox Optional Checkbox | Drag and drop on the document or form to create an optional checkbox.
 |
 Radio Button Radio Button | Drag and drop on the document or form to create a radio button.
 |
 Date Date | Drag and drop on the document or form to create a space for participants to indicate the date.
 |
 Signer Full Name Signer Full Name | Drag and drop on the document or form to create a space with the current signer’s first, middle, and last name already populated.

Use this tool to fill in the signer’s name in the appropriate spaces on the document in advance to save time later. |
 Initial Multiple Pages Initial Multiple Pages | Click this option to add an initial box for the current signer to all the pages of the document.
In the Multi-page initials window, select the placement, alignment, which documents or forms, and which pages in those documents or forms the multiple page initials apply to. Select the size of the initial box. Click Continue to apply the changes.
Use this option when you need to add initials to multiple pages of a document in the same position on each page. |
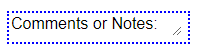
 Single Line Text Box Single Line Text Box | Drag and drop on to the document or form to create a space for the signer to type a single line of text.

Use this tool when you need to leave a space for the signer to respond to you. |
| Markup |  Draw Text Draw Text | Use this tool to draw a text box on the document or form that you can type text into.
Use this tool to pre-fill blank spaces on a document or form, or alongside the Single Line Text Box drag and drop tool to indicate what singers should type. |
 Draw Freehand Draw Freehand | Draw freely on the document or form.
Use this tool to indicate or cross out an irregularly shaped area on a document or form. |
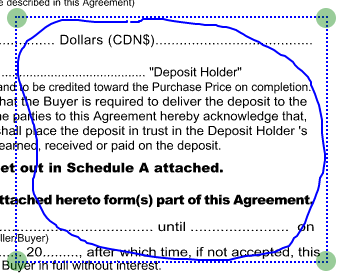
 Draw Ellipse Draw Ellipse | Draw a circular area on a document or form.
Use this tool to draw attention to a circular area of the document or form. |
 Draw Rectangle Draw Rectangle | Draw a rectangular area on a document or form.
Use this tool to draw attention to a rectangle shaped area of a document or form. |
 Draw Highlighter Draw Highlighter | Draw a rectangular area on a document or form.
Use this tool to draw attention to a particular area of text on a document or form. |
 Draw Line Draw Line | Draw a straight line on a document or form.
Use this tool to underline or cross out information on a document or form. |
| ZOOM |  Zoom In/Out Zoom In/Out | Use this tool to increase or decrease the magnification of the document or form. |
 Restore 100% Size Restore 100% Size | Use this tool to return the document or form to 100% magnification. |
| Page |   Skip to First/Last Page Skip to First/Last Page | Use this tool to move either to the first or last page of a document or form. |
 Skip 1 Page Forward/Backward Skip 1 Page Forward/Backward | Use this tool to move forward or backward a single page in the document or form. |
 Skip to a Specific Page Dropdown Skip to a Specific Page Dropdown | Use the dropdown to select a specific page to skip to in the document or form. |
| Layouts | Apply Layout | Click this tool to apply a pre-made layout to a document. Select the document to apply the layout to, select the layout from the list of available layouts, and click Apply. The layout is immediately applied to the document.
Note: You cannot apply a layout to a form, only documents. |
| Save as Layouts(s) | Click this tool to save the current drag and drop and markup changes to this document as a layout.
In the Assign Roles window, use the role dropdowns to ensure that all signers are in the correct roles, and click Save. Type a name for the document layout in the available field, and click Save. The layout is saved and can be used in future signings. |
| Options | Clear | Click this tool to remove all drag and drop and markup changes from a document or form. |
| Exit | Click this tool to exit the document editor and return to the Authentisign Wizard. |
| Save Changes | Click this tool to save the changes you made to this document. Note: All future uses of this document contain the changes you made. |
| Print/Download | Click this tool to print or download the document or form as a .pdf file. |